While this isn't a Party Post, I wanted to share our nursery with you as we had so much fun putting this room together! We are T minus 18 days from my due date as I write this!

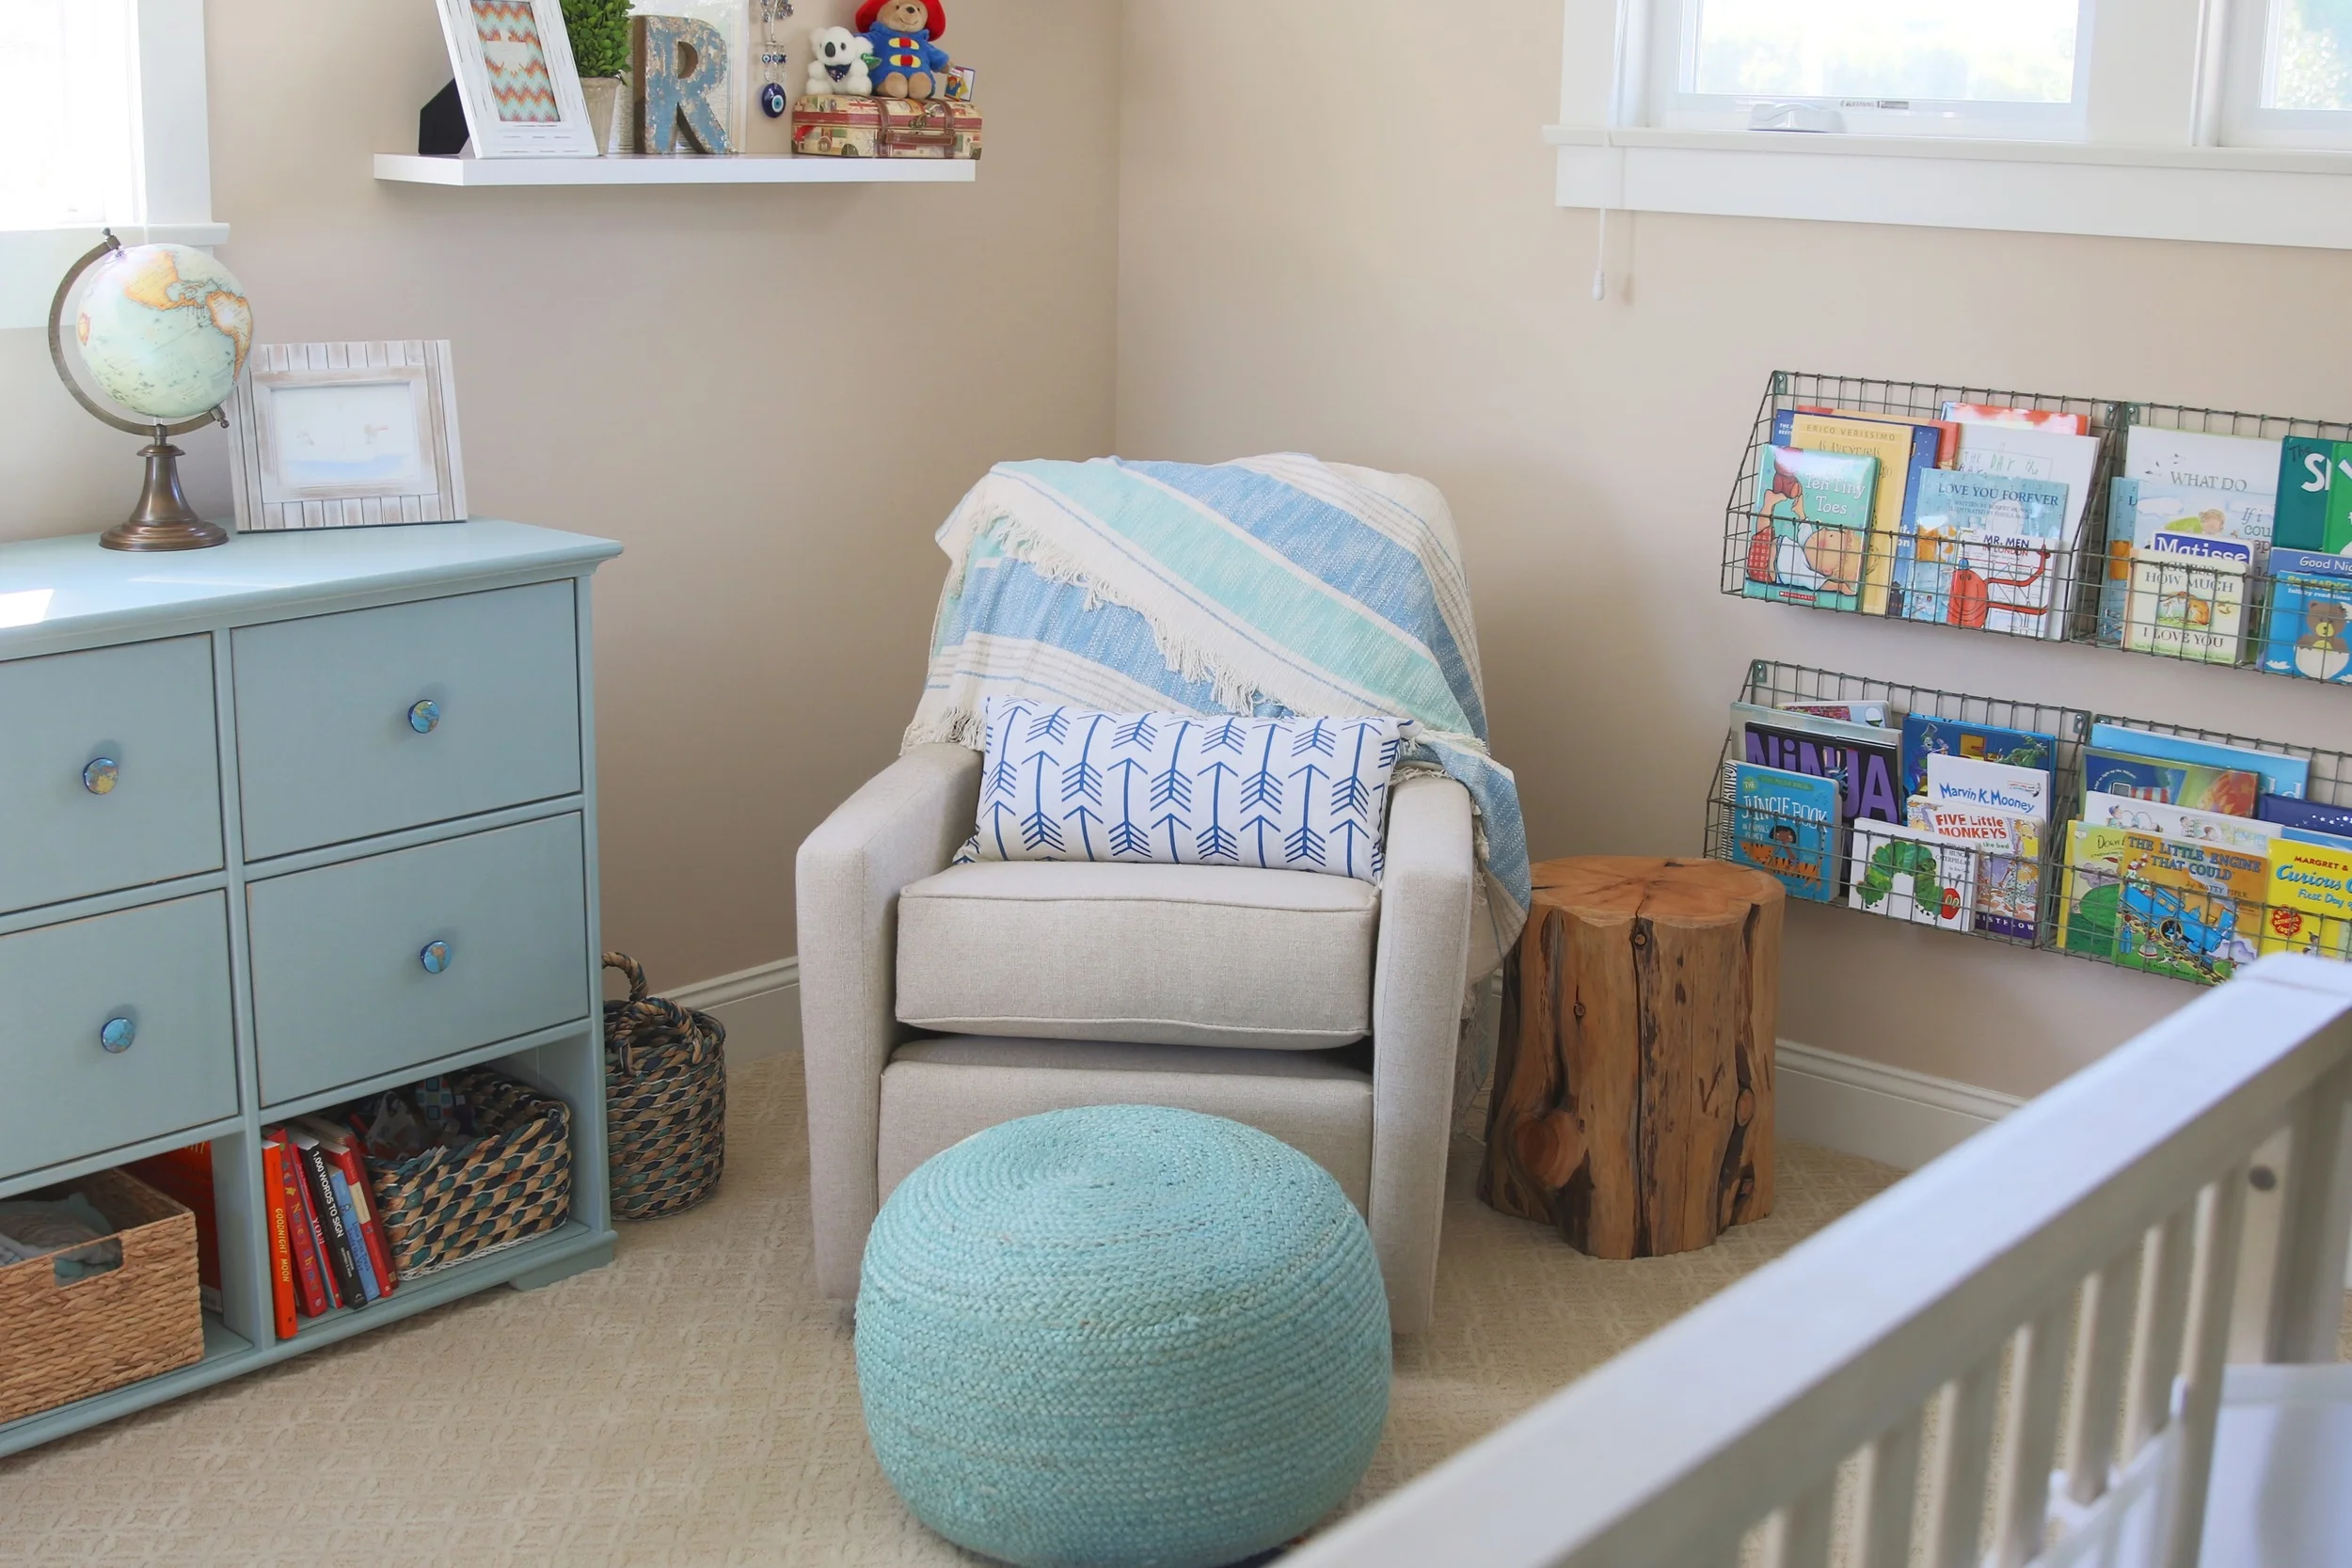
To start off, I knew we wanted a “World Traveler” theme for the nursery, especially since my husband and I are world travelers ourselves, and our little guy will likely be brought along for the ride! Plus, I think it is a great way to expand their small space to include different places, cultures, and ideas.
Now for the details.
The Dresser:

Our first project was the dresser. This is the HURDAL dresser from IKEA, that comes with 9 drawers. My sister-in-law Victoria gave me the idea to have open shelves at the bottom, so our little one can access his favorite toys and books on his own in the early stages. We assembled the dresser without installing the bottom 3 drawers. Instead, we added thin pieces of plywood and glued/screwed it to the bottom of the dresser to replace the drawers. We painted this dresser with Annie Sloan’s Chalk Paint in“Duck Egg Blue”. We chose chalk paint because it is easy to use, and you don’t need a primer. We used Annie Sloan’s wax to finish it up.
For the drawer pulls, I wanted small globes, which (of course) I found on Etsy!
Done.
The Crib:
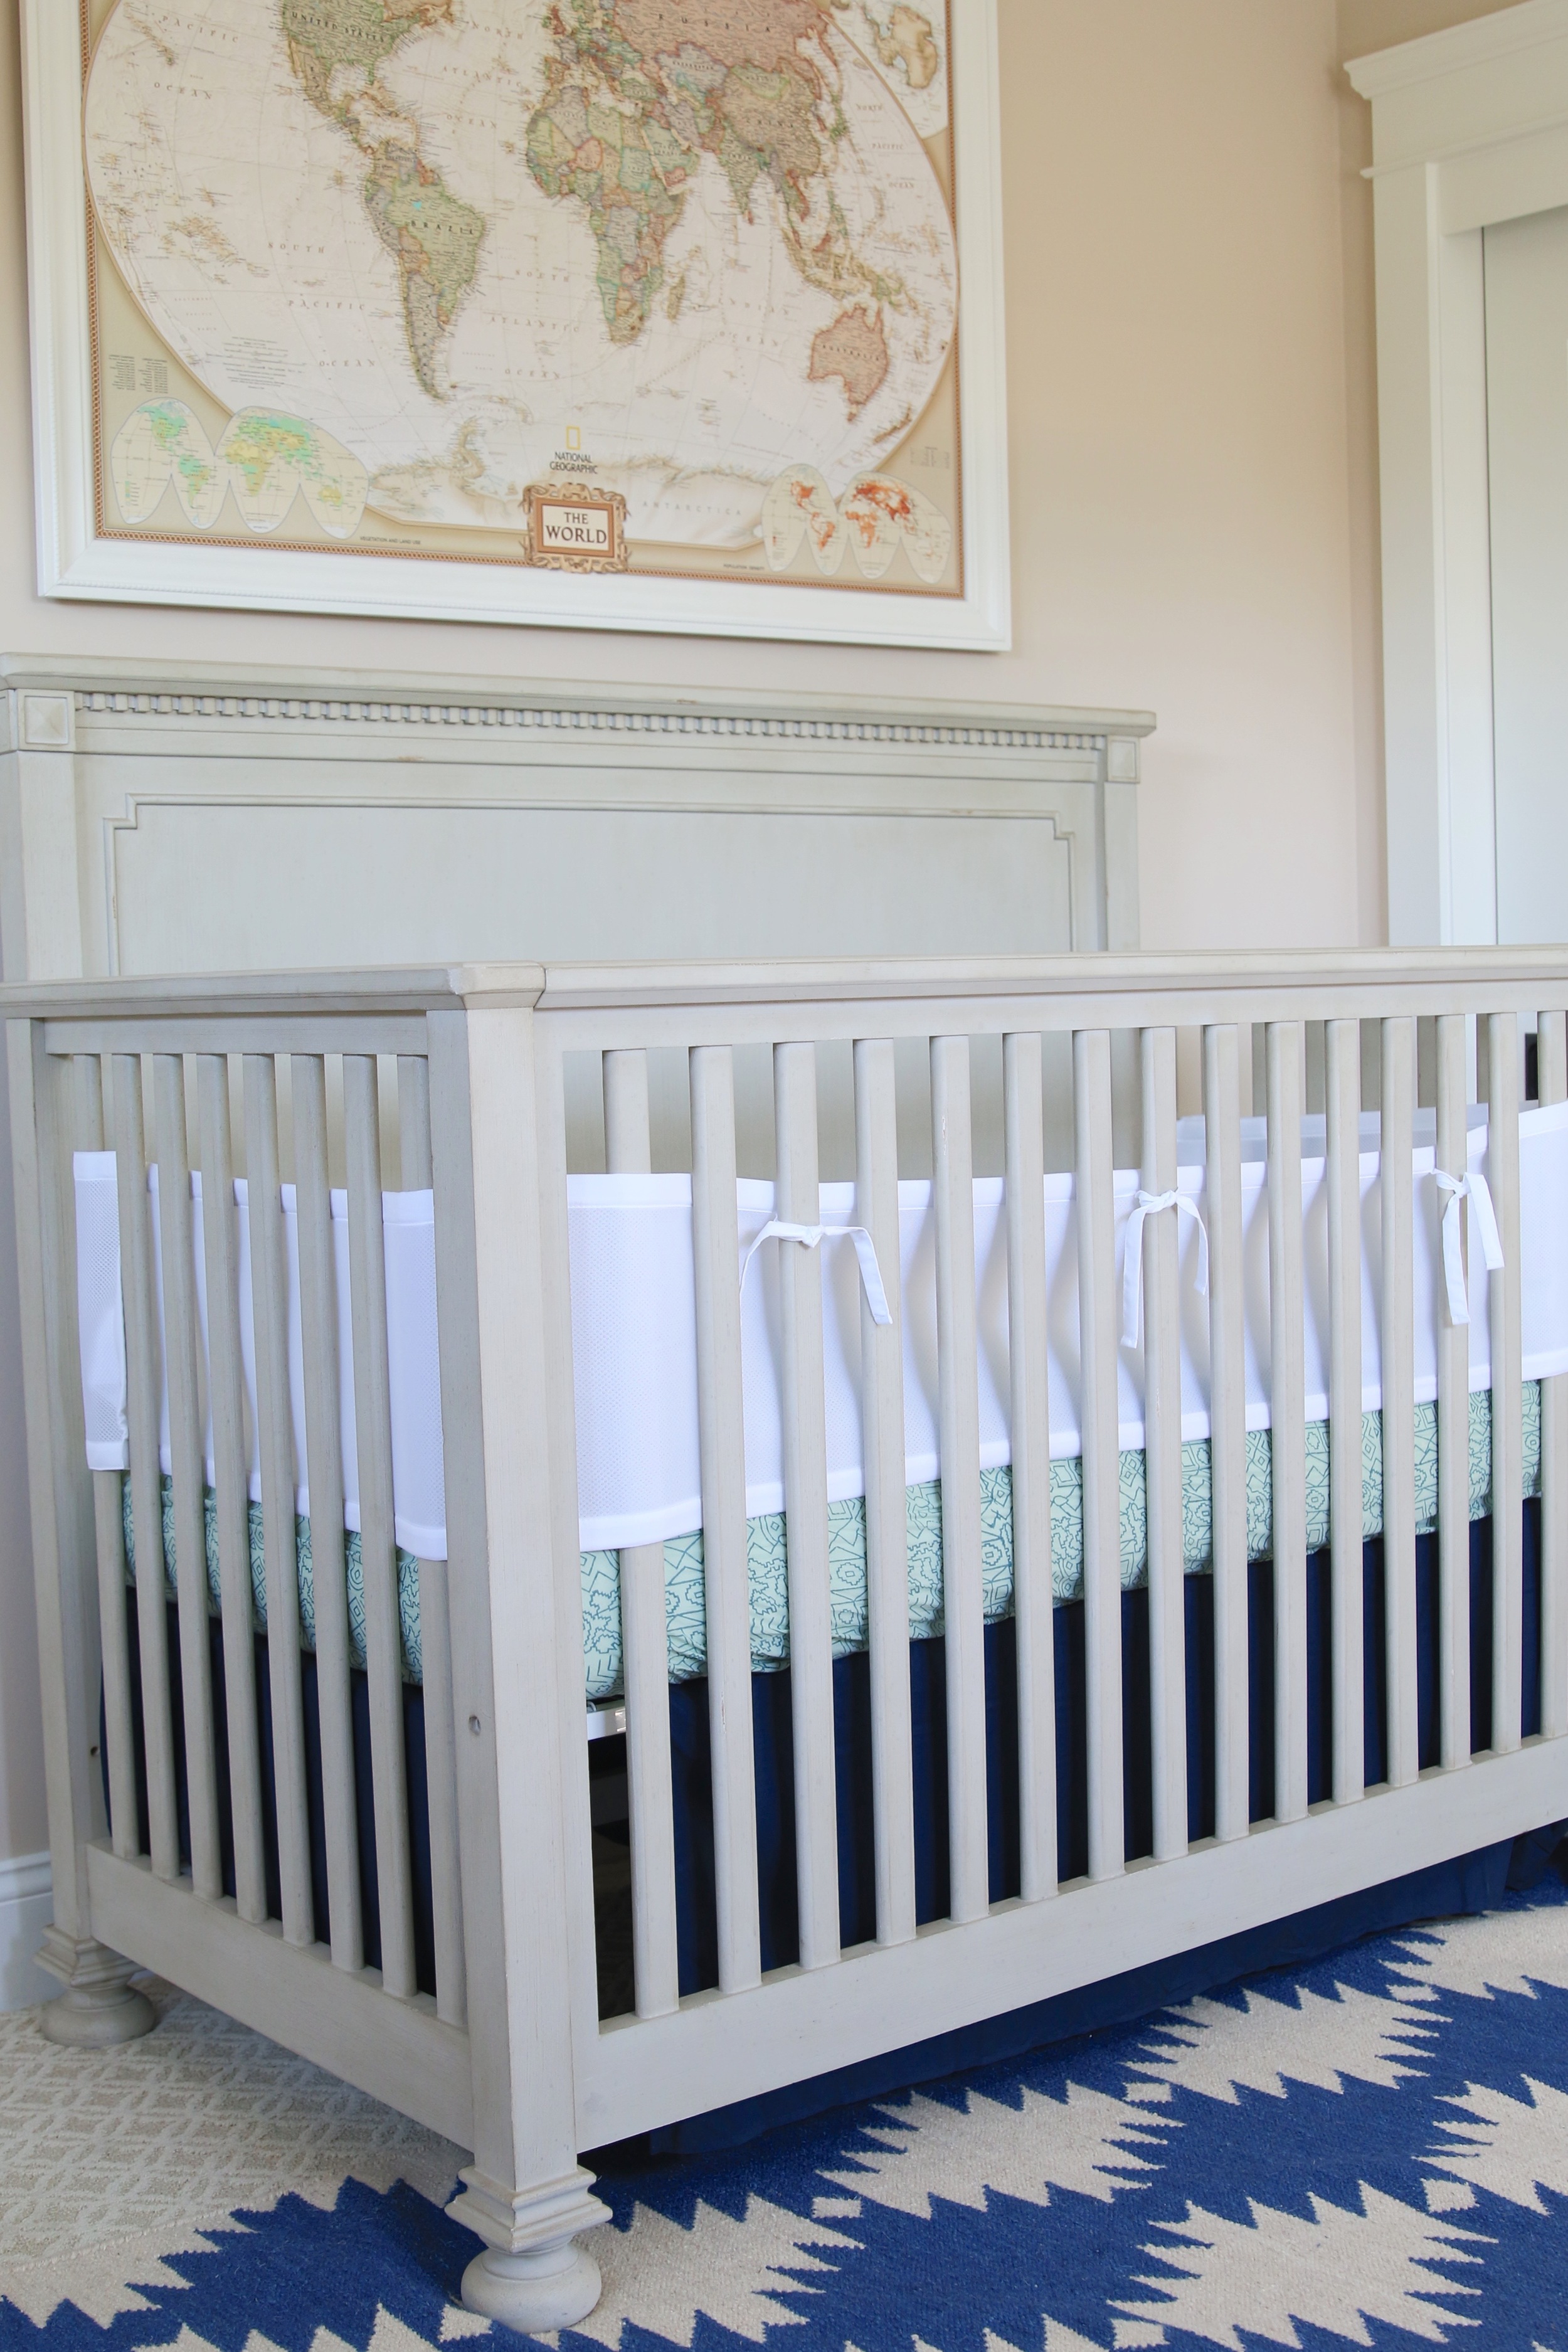
Since we saved on what otherwise could have cost us thousands of dollars on a dresser, we did splurge on the crib. With the help of an RH gift certificate and their 20% off sale, we went with Restoration Hardware's beautiful Jameson Conversion Crib in Antique Taupe. Our second place was another great crib by Newcastle at a lesser price from BuyBuyBaby.
The World Map:

Our next project was the world map. I really wanted a pin board map, so as we travel the world with him we can mark the places he goes, and we can also easily transport the map if he later moves to a different room. I found this gorgeous National Geographic map on Amazon for $16 with shipping!
We then went to Home Depot to buy cork board (which is actually in flooring), thin plywood, MDF moulding, white paint, and white wood filler. We started by measuring the dimensions of map with the moulding framed around it. We then cut the plywood and corkboard to fit these dimensions, and glued the corkboard to the plywood, and then the map to the corkboard. We used good ol’ E6000 glue. Once the map was glued and dried, we then cut the moulding to have diagonal corners one at a time until they perfectly framed the map. We painted these white first, then when dry, we glued these all down on top of the map/corkboard.
The next day, once the glue had set, we flipped it all over, and screwed through the plywood, the cork, and the frame to make sure the frame was secure. We were careful to measure the length of the screw so that it didn’t puncture the frame. We flipped it back over, and used the wood filler to fill any gaps between the corners of the frame. We touched up the corners and the frame with the white paint, and it was done! It was quite a mission, but it will be so worth it as we are able to have this with him and his travels throughout his childhood!
The linens:

My other sister-in-law Alicia tipped me off to Woolf With Me, which has AWESOME patterns and textures for baby/kids bedding and clothing. I bought the changing pad cover from here. She also got my crib sheets and bedding from a super cute Etsy vendor Hokoda.


These wire shelves we got from World Market. I love this because he will be able topick and choose his own books when the time comes!

My favorite item is this custom artwork made for our baby that includes our dog Tioki in it by Phephe Rose!

The nursery is finished. Now it’s time to fill these frames with baby photos, this room with love… and then let him mess it all up!
- Eve Gracie