

Gender Reveal parties are a super fun way to celebrate finding out the gender of your baby along side all of your closest family and friends. There are countless ways reveal the gender, but when it came time for our gender reveal, we wanted one that everyone could be involved in.
First, we started with a Bowties and Bows theme. I found a great invite on Etsy that went with this theme, and used Celebrations.com to send them out digitally.

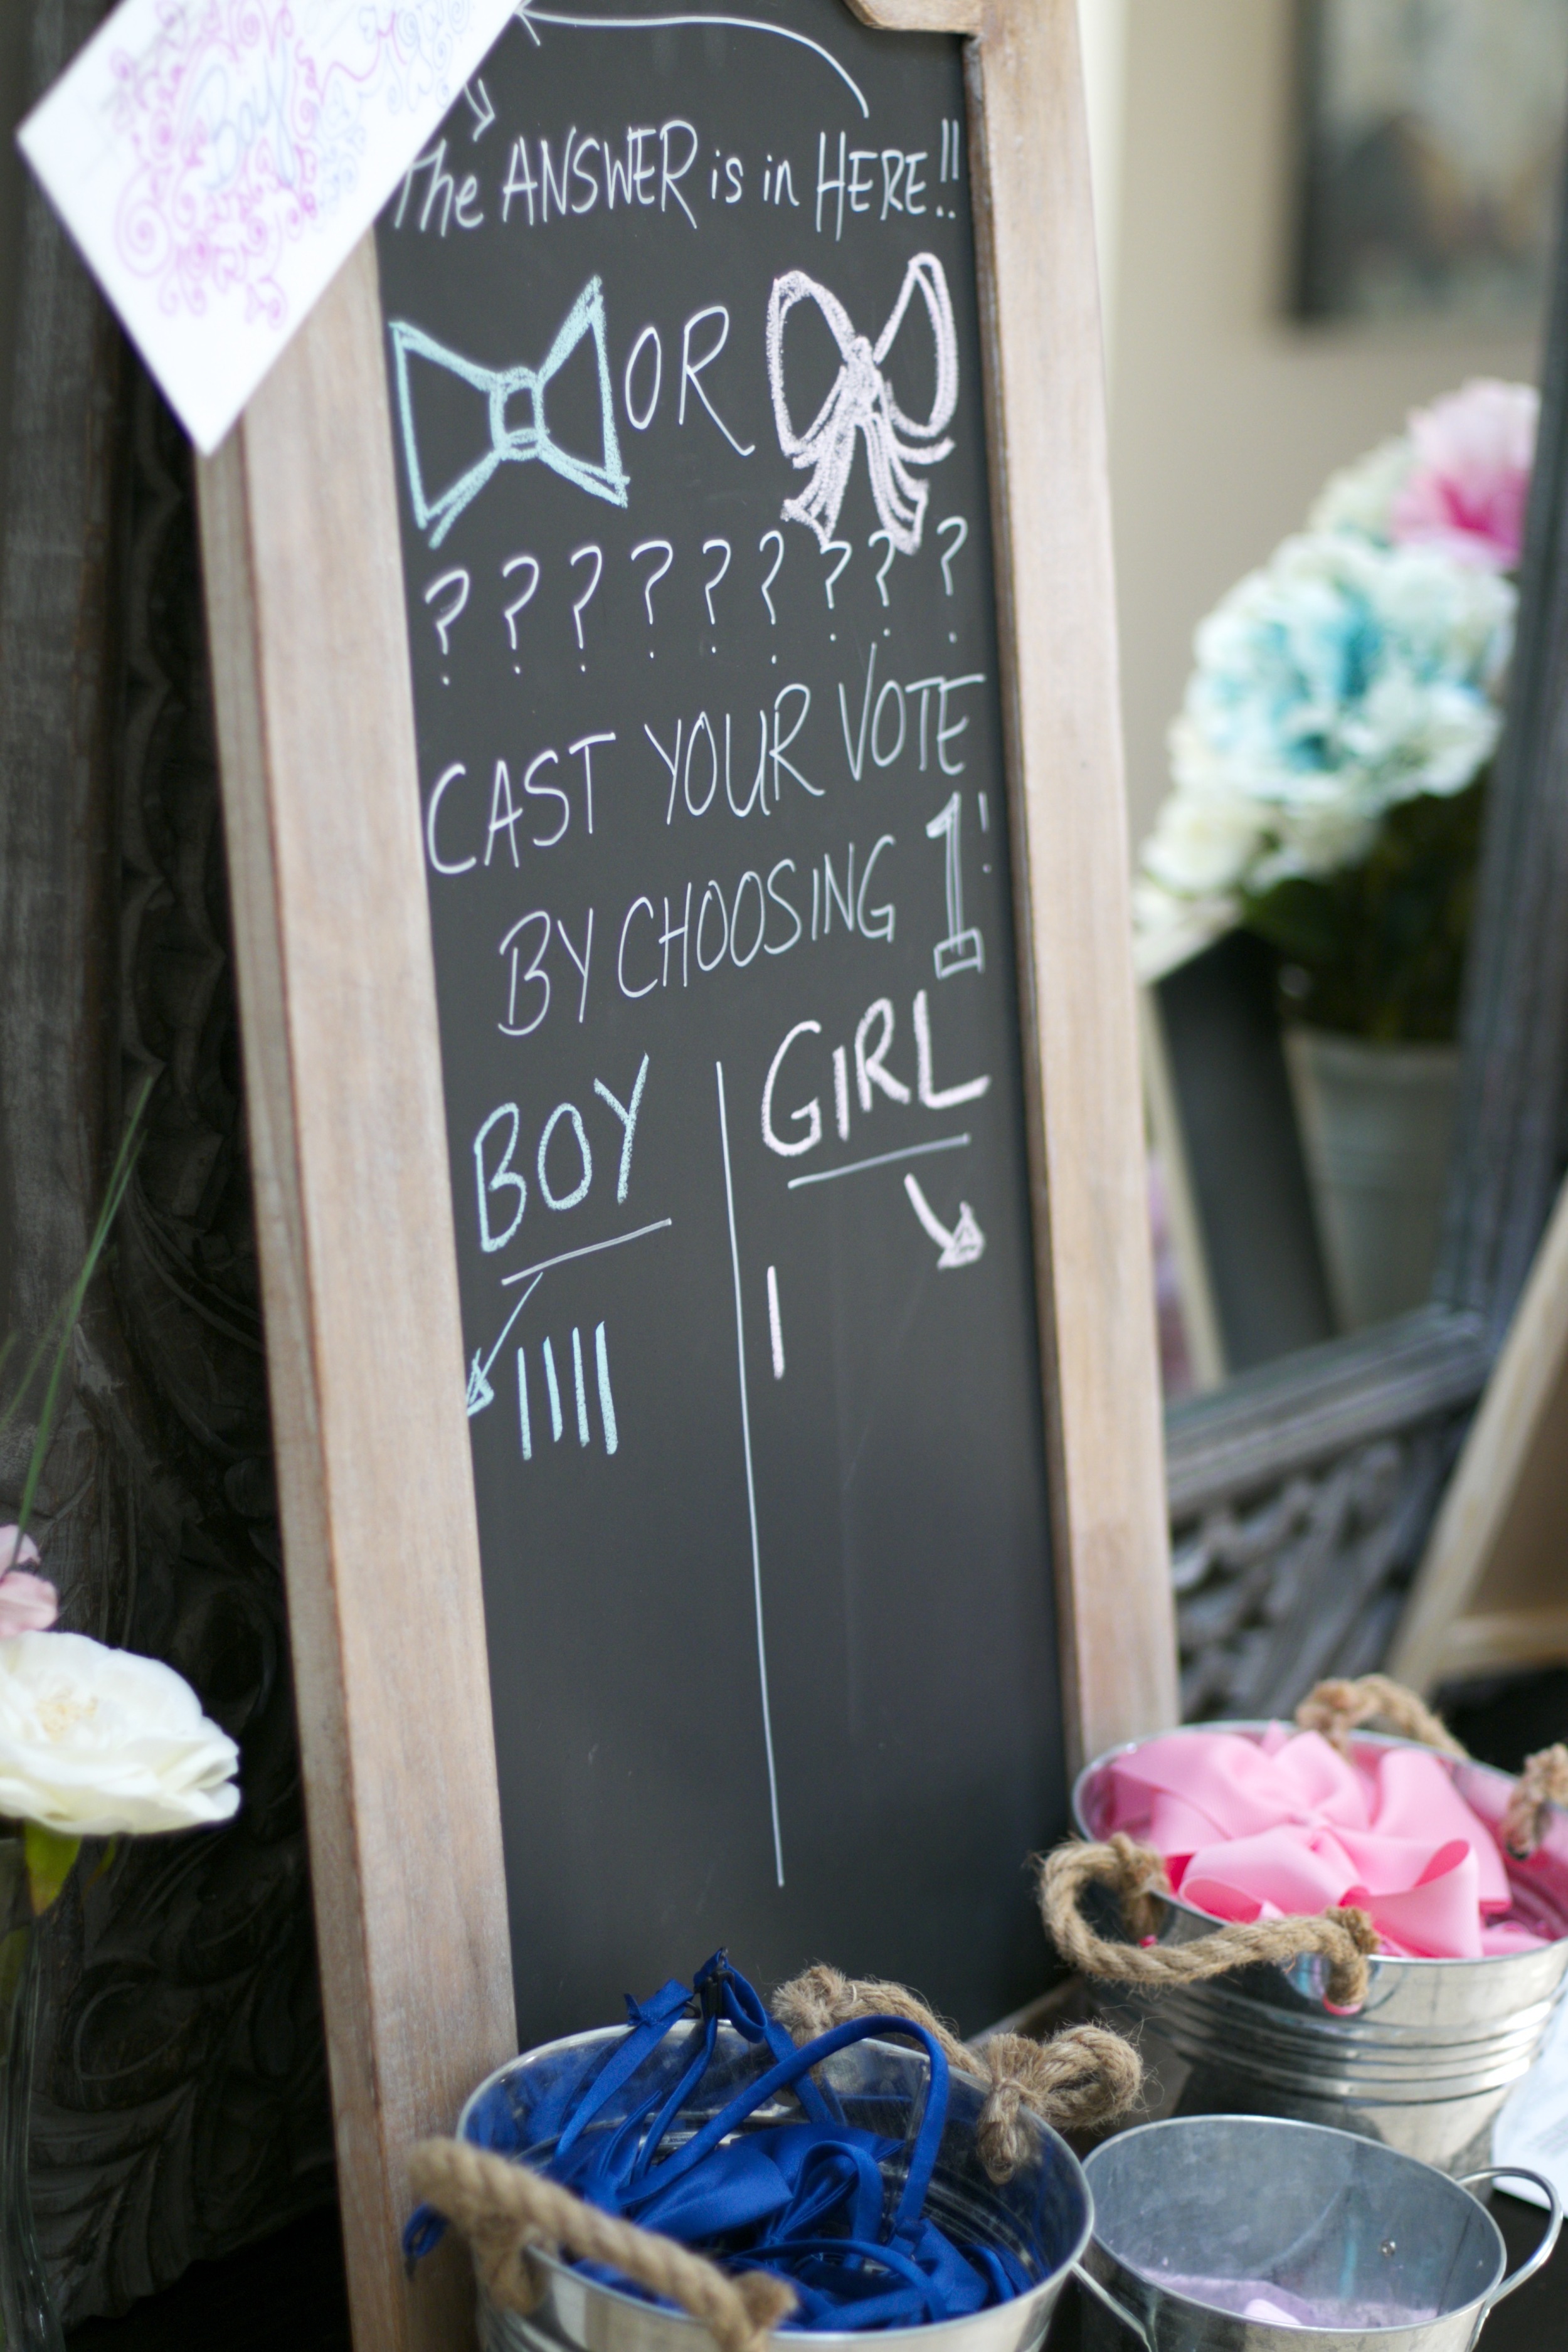
I ordered small pink bows and blue bowties as seen below. When our guests arrived, they had to cast their vote, boy or girl, by either clasping a blue bowtie around their neck, or attaching the pink bow to their clothing or hair. My husband was team girl, and I was team boy!
The Games.
Before we revealed the gender, we had several games for the guests to participate in.
The name game. Our guests wrote down their name suggestions for both a boy and girl, and entered them in the buckets. Our family has a fairly unique naming tradition, so we indicated what letters we wanted to names to start with.

We then went through the names and picked our favorites, one boy name and one girl name, and gave the winners a prize. Some were cute, some were deep, and some were funny (like Ravacado, named after my husbands favorite food).

We also played a wives’ tale game, where we tested how well our guests knew the old wives tales about how to determine the gender of the baby.

The last game was a baby charades game. Where people got to act out words associated with babies. The best part was watching all the single men try to act some of these things out (like changing a diaper)! We also had some physical games going in the backyard like "corn hole" and badminton.
The Reveal
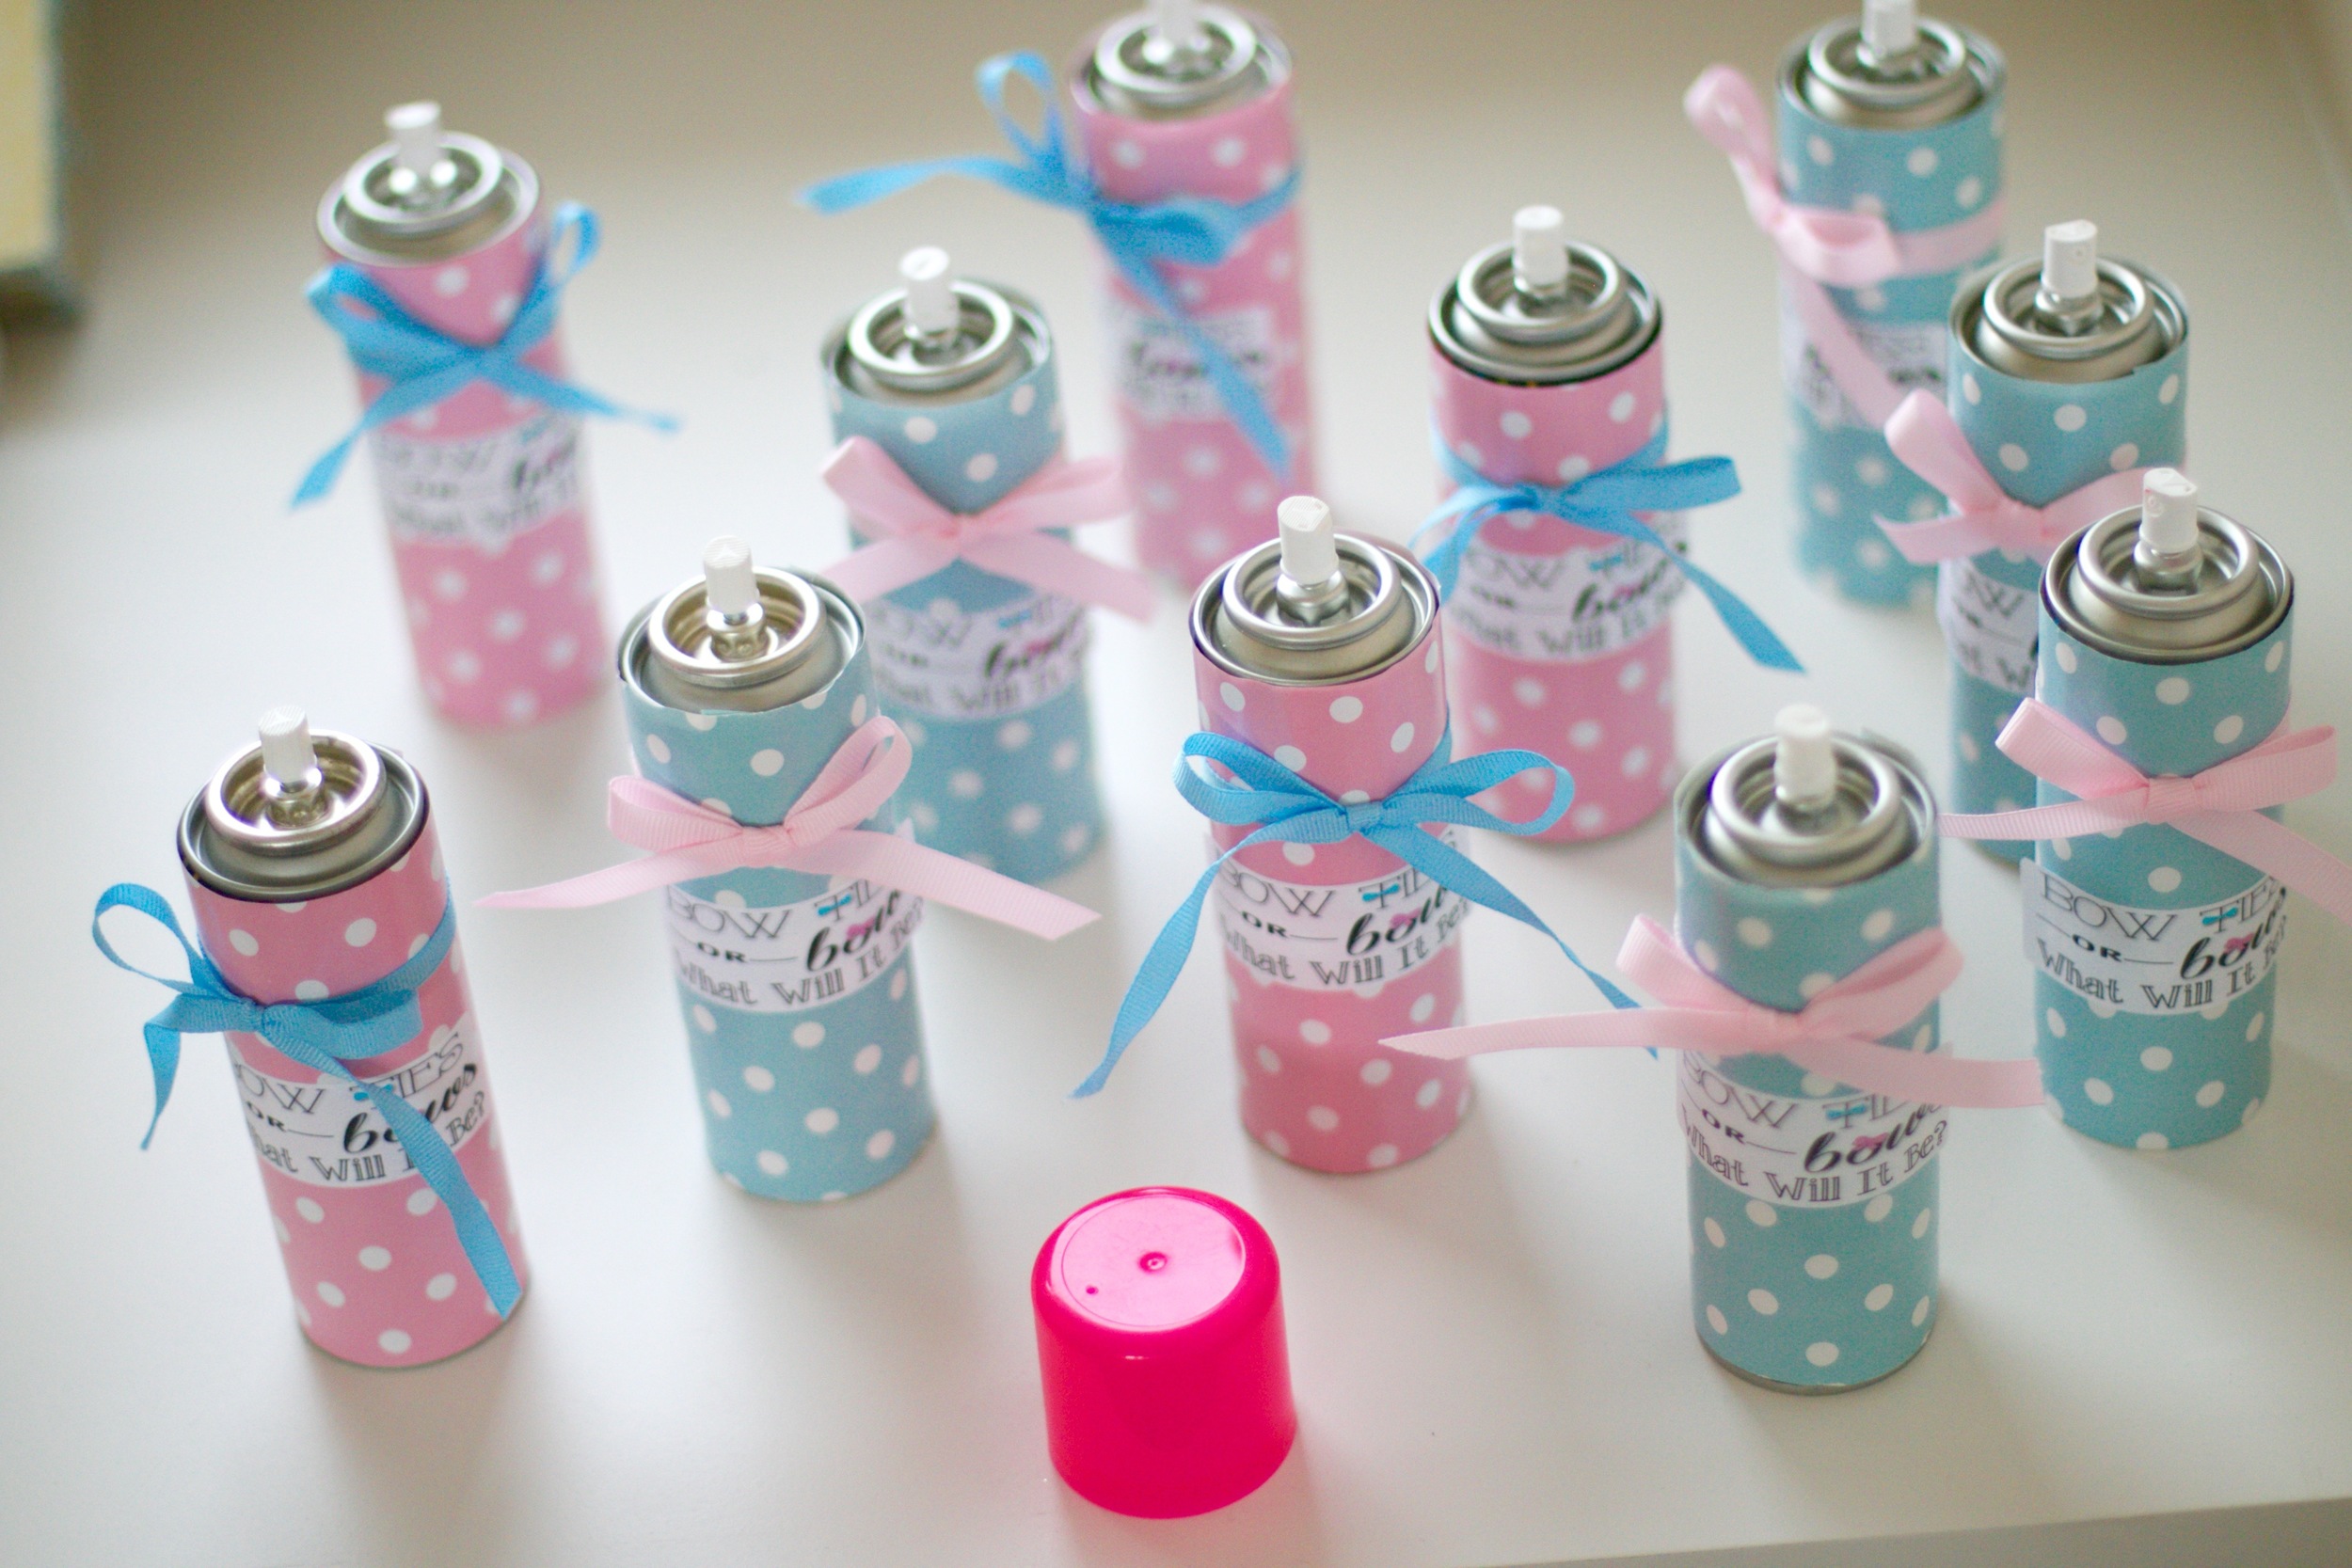
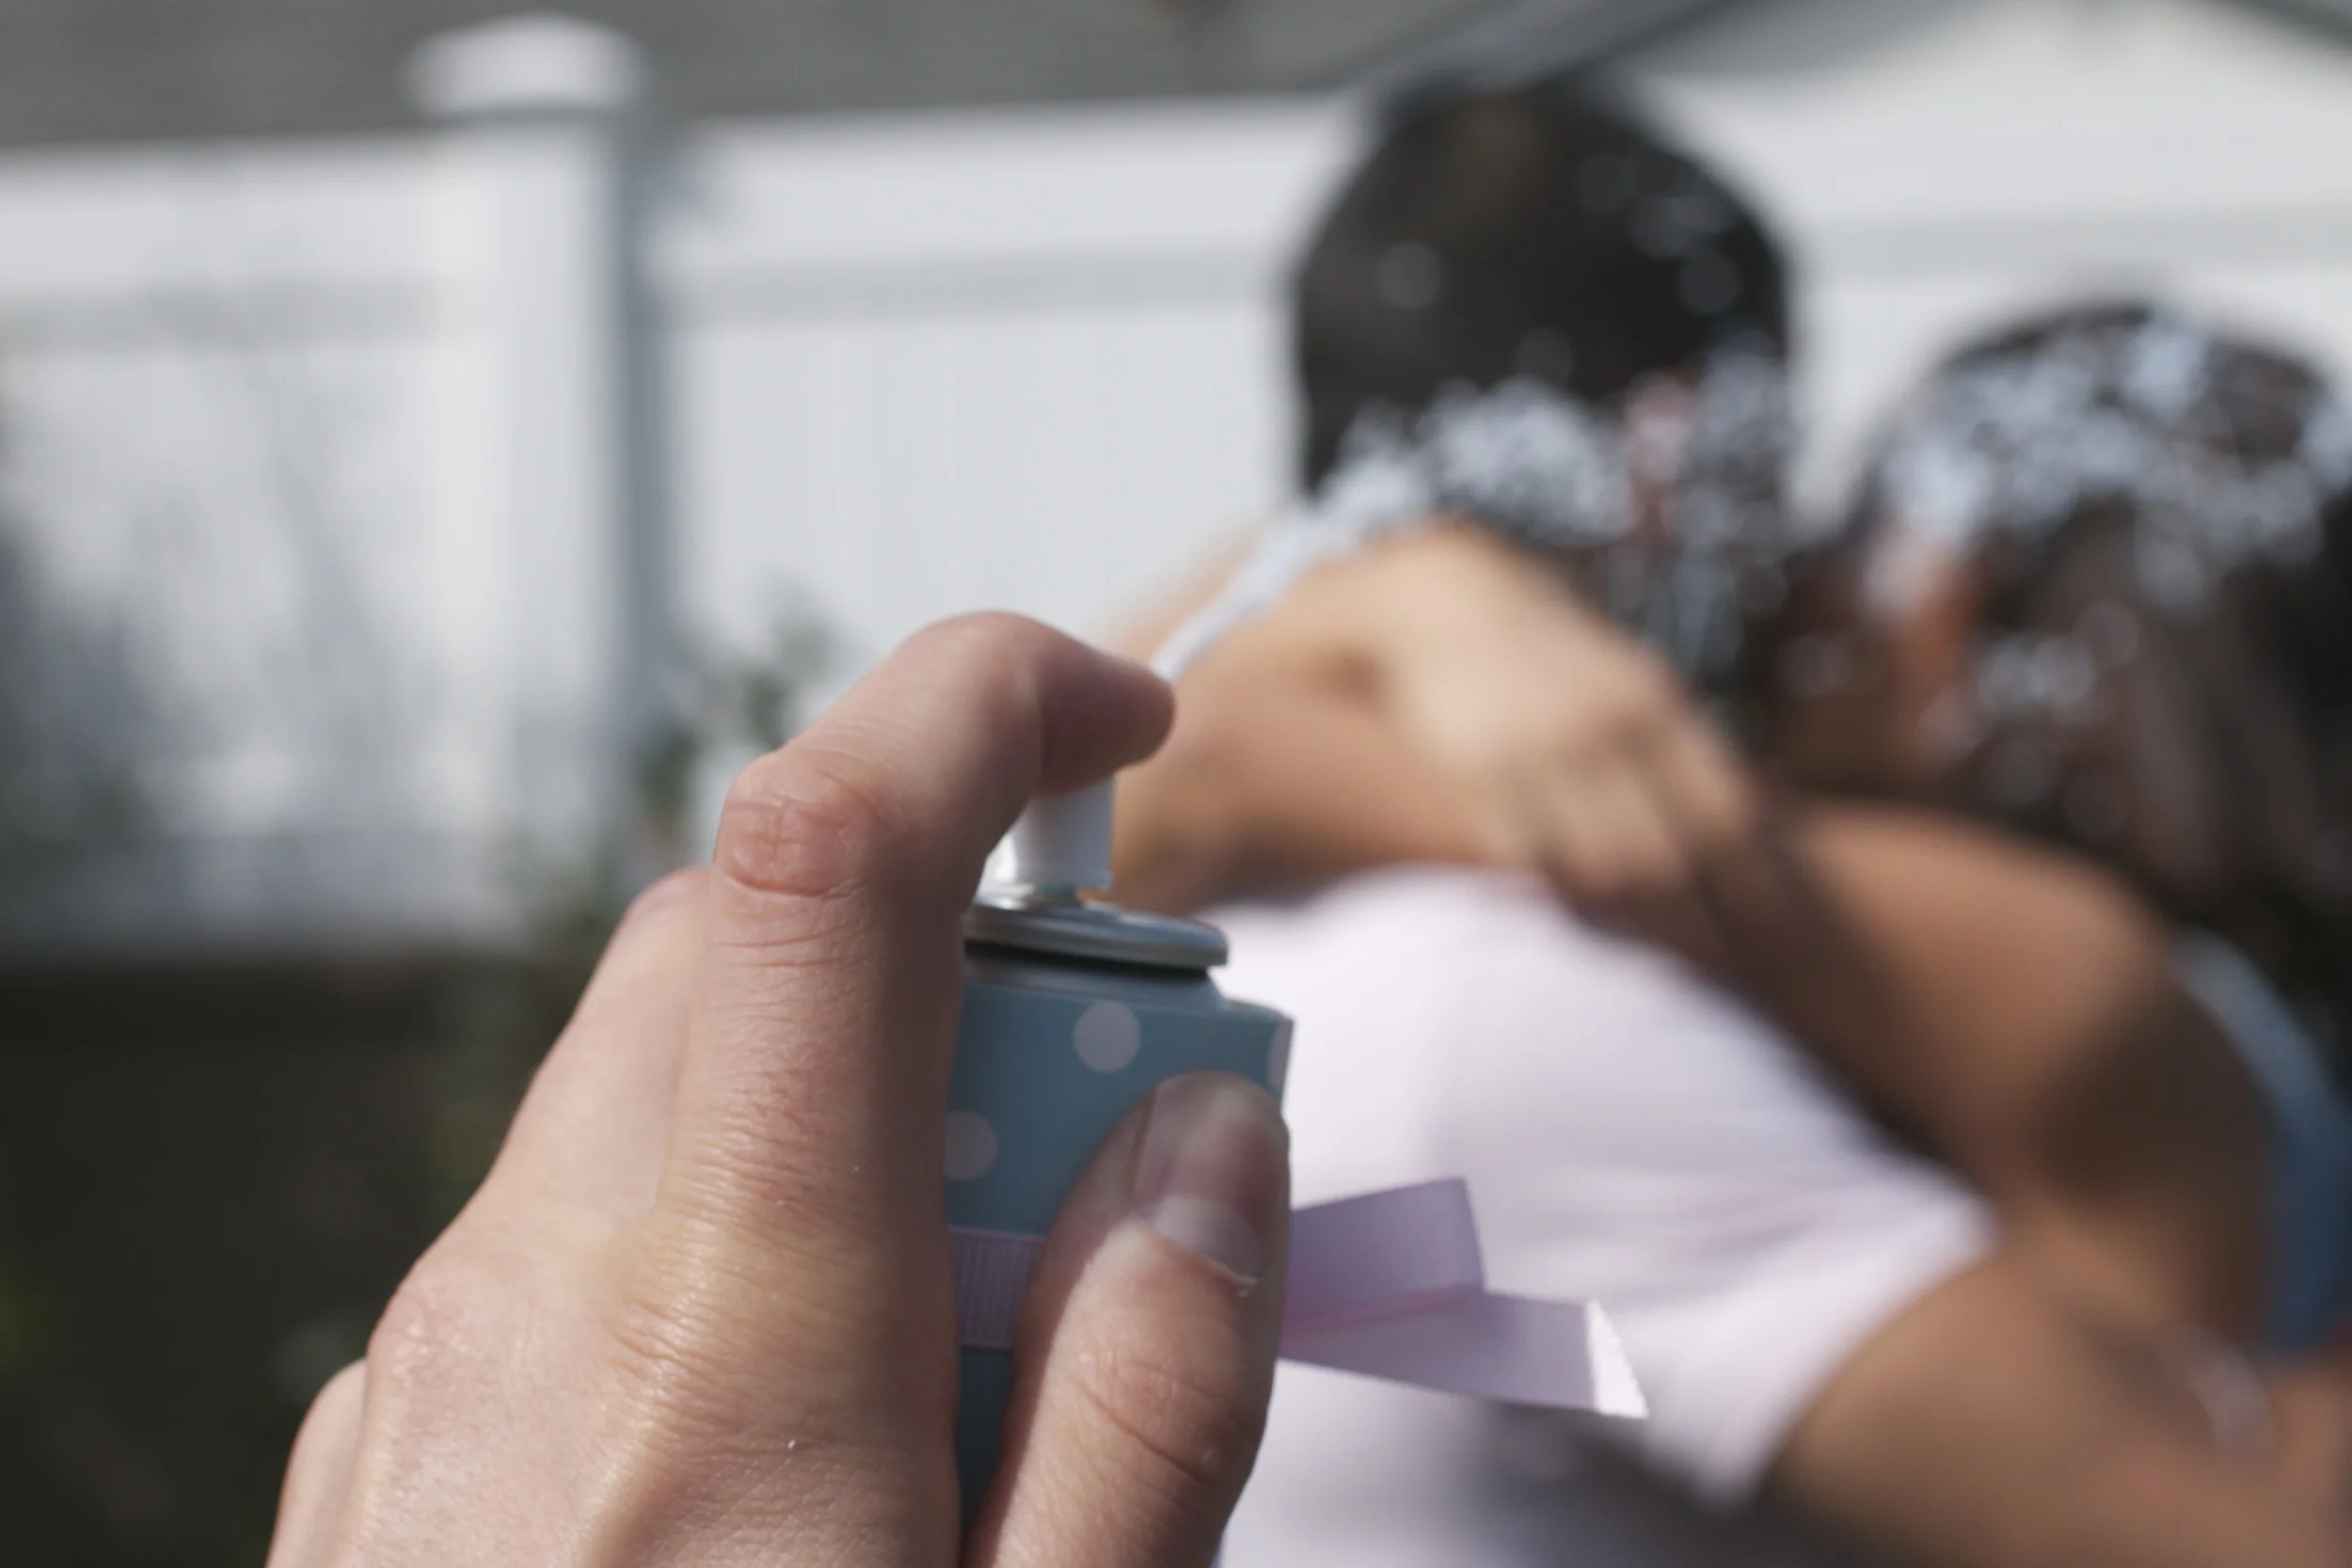
We wanted something exciting and visual, and nothing screams fun and messy more than silly string! We bought silly string in both pink and blue, and wrapped them to look the same before hand. We kept them separate, and then had my sister-in-law Sage be the one to read “the envelope” first, and pick the right color. Each family got a silly string, and on THREE, everyone sprayed us until their cans ran out.
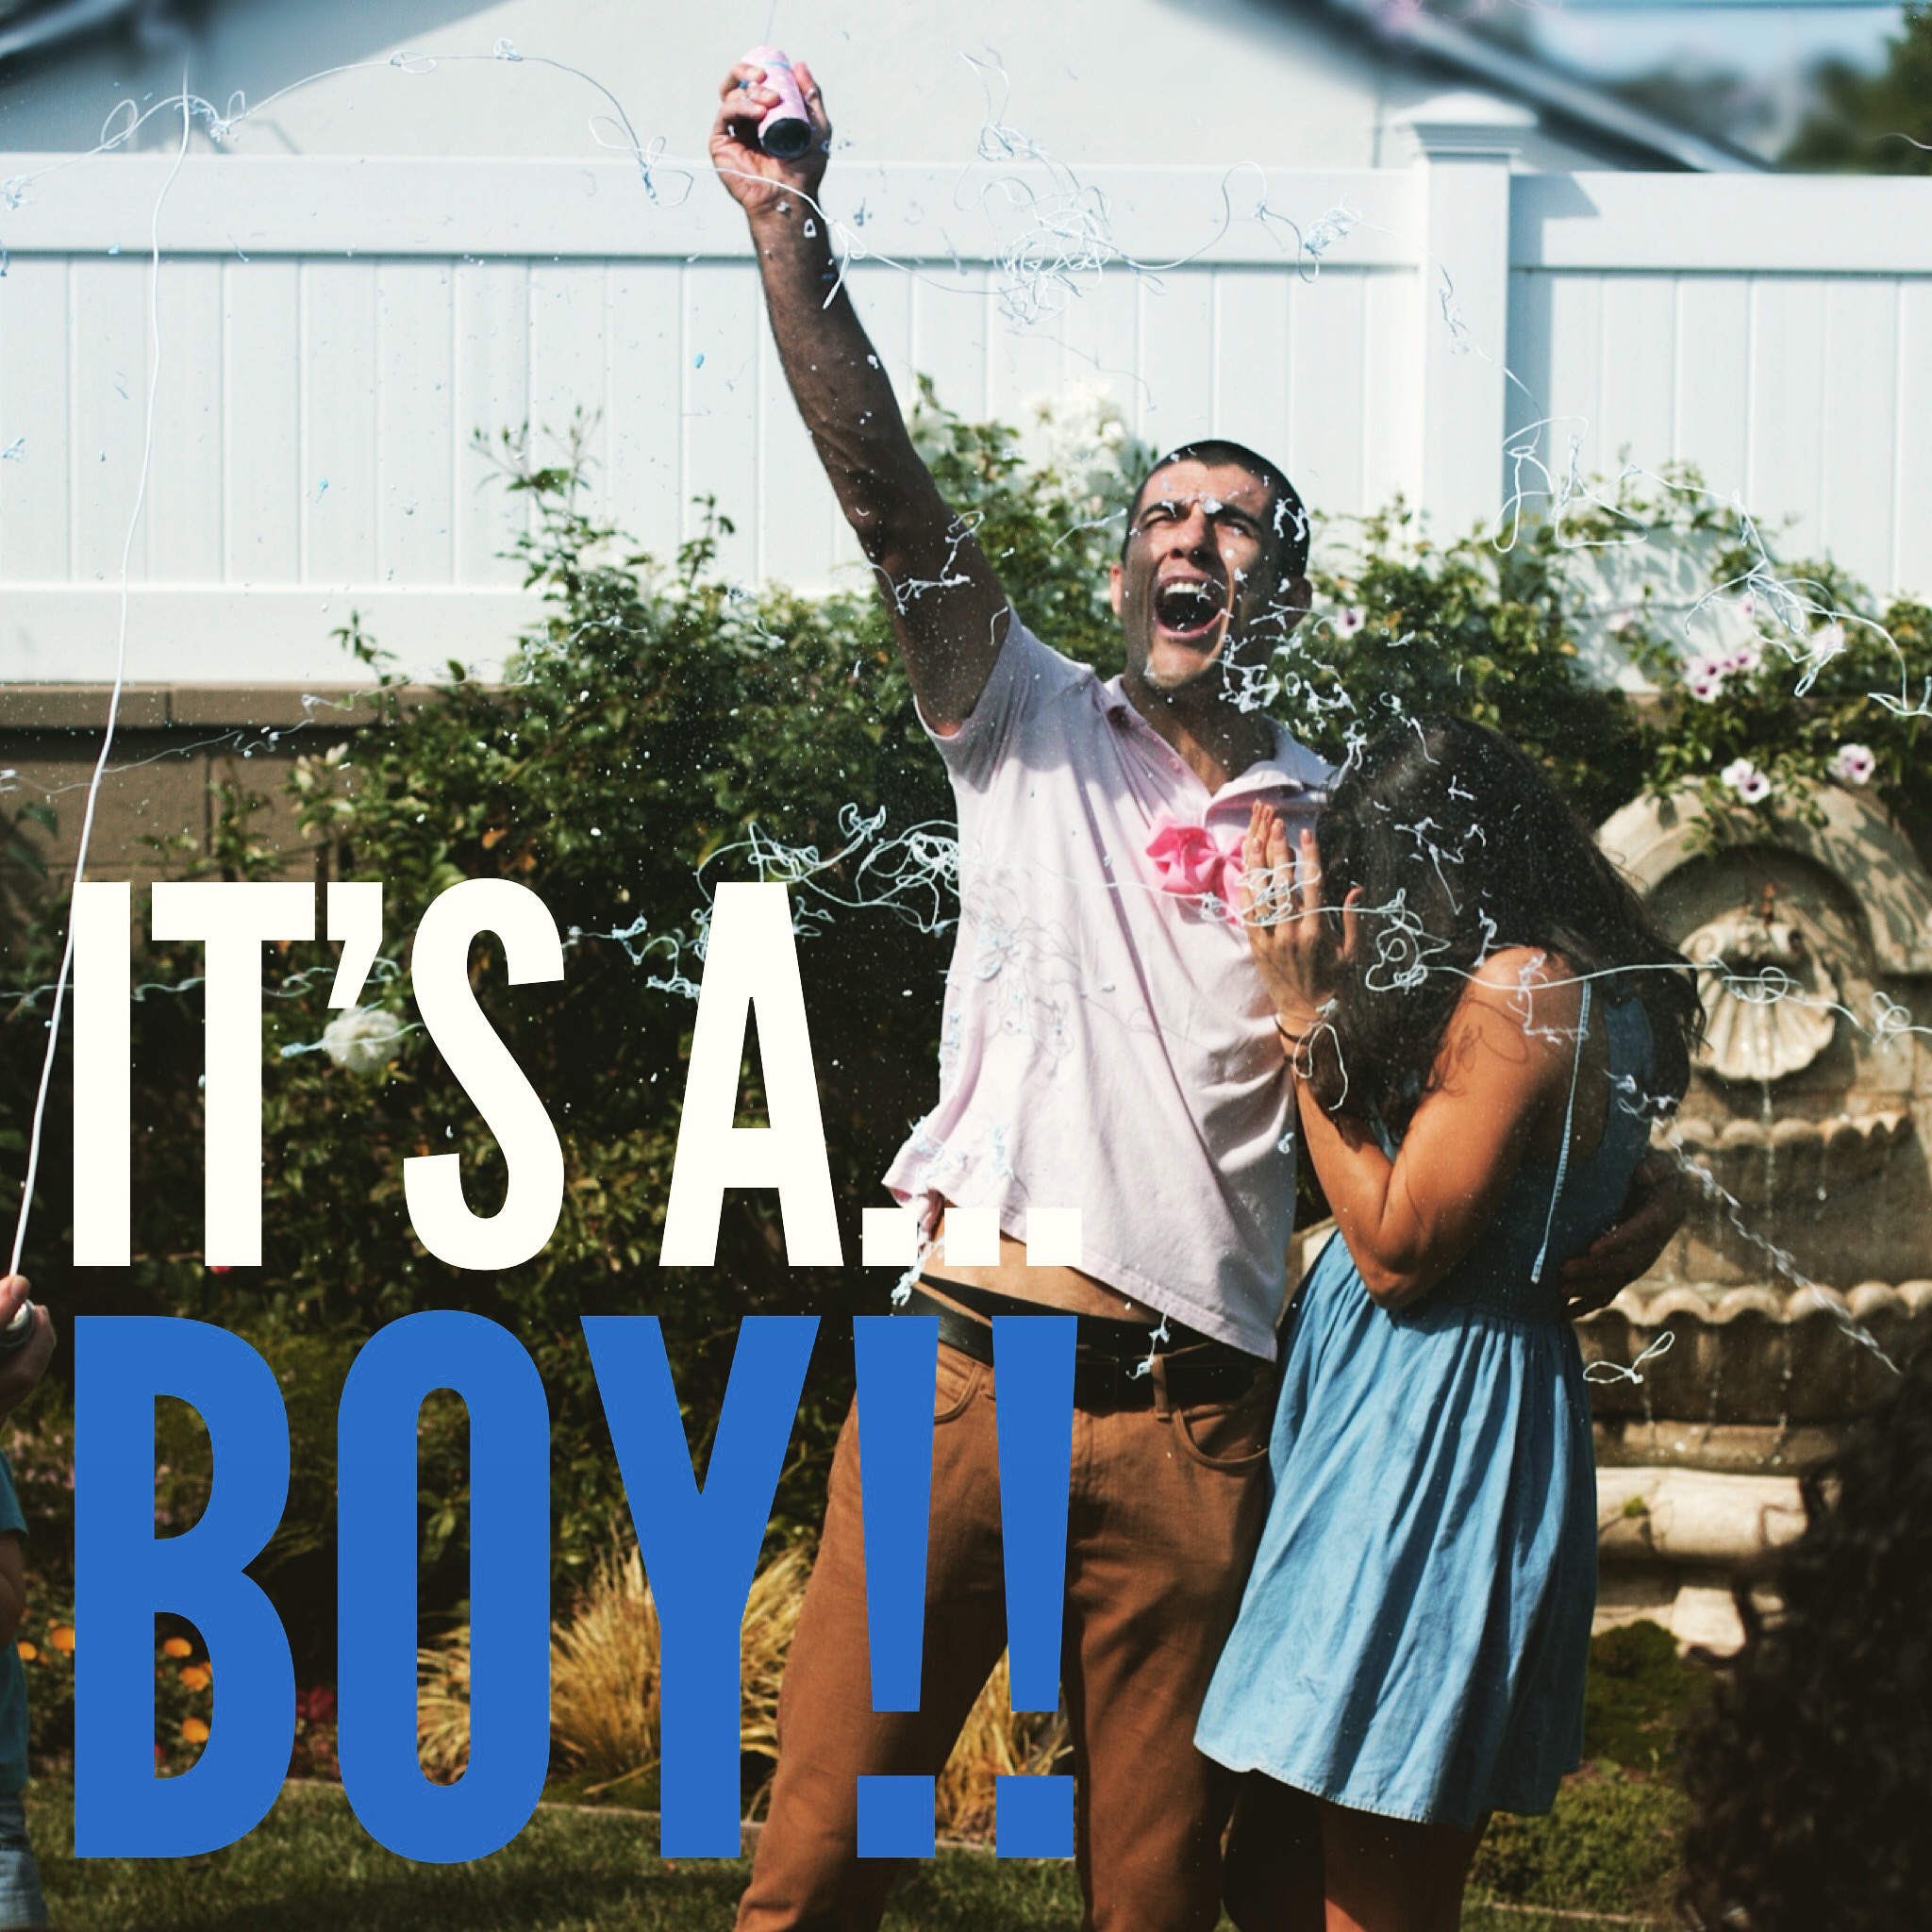
It’s a BOYYYYYYYY!!!! My husband was screaming, as I hid my face from the silly string attacking my face! He seems awfully excited for someone who was “Team Girl” ;-) We were both elated, and were so happy to share this moment with our family, friends, and my parents on Skype!
Looks like this squad of boys will have one more member joining their team!